Site seems to be OK. Load issue should be resolved now.

Teaser: Project for the shooting bench

Sit back and talk with friends. Same rules as before. Rule #1-Relax with friends on the front or back porch.
Rule #2-No Politics, religion or anything above a G level.
User avatar
BrokenolMarine
Ranch Foreman
Posts: 7473
Joined: Sat Nov 26, 2016 8:28 am
Location: South Central Oklahoma in the mountains
United States of America

Teaser: Project for the shooting bench

Post by BrokenolMarine » Sun Oct 09, 2022 4:47 pm

:twisted:

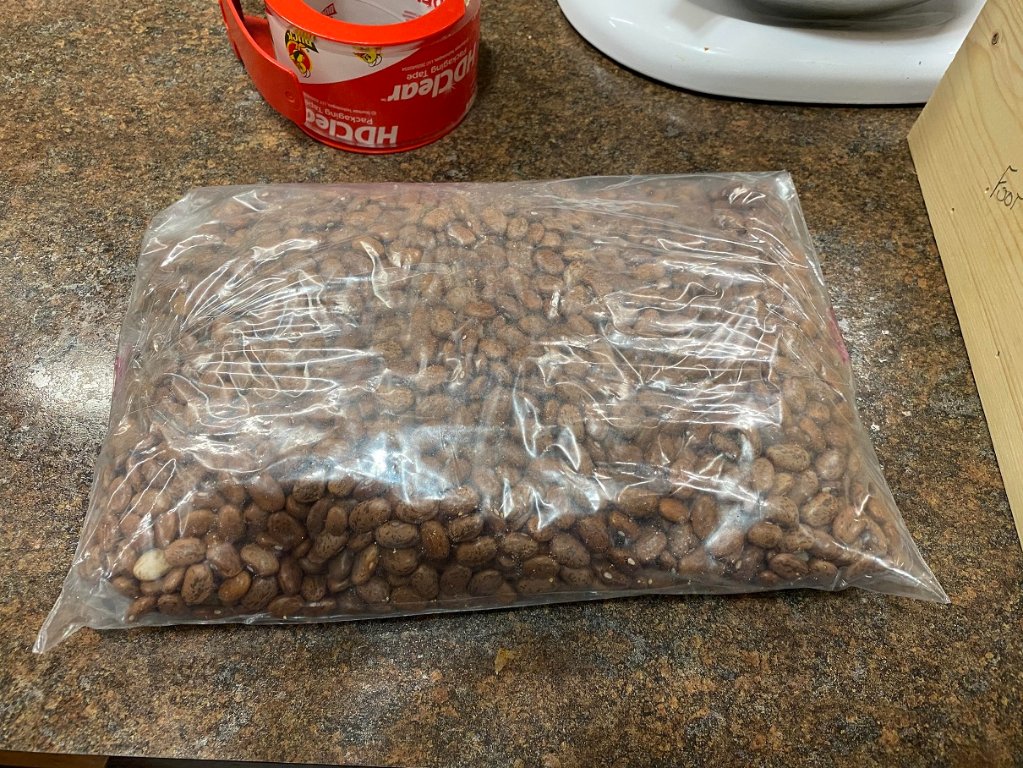
After the shooting session the other day, I rediscovered a need that comes in very handy with certain types of rifles. A tall rest for sandbags. Useful for Scopeless Rifles, or those with extended magazines, or anything that can't sit close to the bench. Rifle shooters will all know exactly what I'm talking about. You can buy the fancy ones with a screw lift built in where you dial adjust a height to put you perfectly on target when you have the butt of the rifle ALSO sitting in a sandbagged rest. ;) (Fancy. 8-) )

https://www.midwayusa.com/product/1015052687?pid=682659

I adjust the vertical and horizontal alignment by moving the butt of the rifle which I hold in my left hand, as I was taught. So, I went out to the woodshop, and built a simple ladder type lift. 8" wide feet, 12" sides and 10" cross beams. I can lay some sandbags across the top crosspiece and rest the rifle on that. Or, a simple folded towel will work. This will clear an ARs 20 round mag, the lever on the Henry, or raise the open sights on the odd bolt gun to a usable level. I'll take pics when the clamps come off the build. I say simple as I didn't waste time rolling the edges, staining or painting as I normally would. This isn't a show piece. It's a knock around range piece of working equipment I'll toss in the bed of the ranger for back and forth transport and store in the rangehouse. When it's beat up, I'll make another and add the improvements I'm sure I will discover I need.

Pictures to follow. :)
You can tell a lot about the character of a man...
by the way he treats those who can do nothing for him.

I don't look back at the things I can no longer do, I just look forward to the things I still can.

User avatar
RetiredSeabee
Administrator
Posts: 2488
Joined: Mon Mar 21, 2016 5:04 pm
Location: Harrisburg, North Carolina
United States of America

Re: Teaser: Project for the shooting bench

Post by RetiredSeabee » Sun Oct 09, 2022 6:12 pm

Looking forward to seeing your design, be aware that I might be tempted to copy it.
Load on Sunday and Shoot all Week.......okay it's a Mare's Leg I will reload on Wednesday. ;)

User avatar
BrokenolMarine
Ranch Foreman
Posts: 7473
Joined: Sat Nov 26, 2016 8:28 am
Location: South Central Oklahoma in the mountains
United States of America

Re: Teaser: Project for the shooting bench

Post by BrokenolMarine » Sun Oct 09, 2022 7:14 pm

Here is the design... feel free to copy away, and as I make modifications, I'll post them. I am going to have Tina make a dedicated sandbag or bean bag, or make one myself. I'll post that as well.

The rest in clamps, upside down on the bench....

rest in clamps.jpg
rest in clamps.jpg (186.69 KiB) Viewed 951 times

Out of the clamps...

out of the clamps.jpg
out of the clamps.jpg (177.51 KiB) Viewed 951 times

Of course, if I was making this for someone else, I would use the special tools I have to remove the squeeze out of the glue, and I would have rolled all the edges. I would then stain or paint the rest to make it look pretty/professional. As I said in the OP, I'm considering this a working prototype and will leave it as is. (Unless I get bored.) I'll knock out the sand/bean bag and it'll get tested really soon. I have long guns to shoot. ;)
You can tell a lot about the character of a man...
by the way he treats those who can do nothing for him.

I don't look back at the things I can no longer do, I just look forward to the things I still can.

User avatar
BrokenolMarine
Ranch Foreman
Posts: 7473
Joined: Sat Nov 26, 2016 8:28 am
Location: South Central Oklahoma in the mountains
United States of America

Re: Teaser: Project for the shooting bench

Post by BrokenolMarine » Sun Oct 09, 2022 7:20 pm

If I was making this to take into public:
* I'd roll all the edges.
* I'd round all the corners
* There wouldn't be squeeze out.
* I would have used my dado blade to rabbit the join between the feet and the vertical sides.
* I would have cut a dado slot for the cross piece at the top and moved the bottom cross support above the level of the feet and cut a dado for that to rest in.
* I would have drilled pilot holes, counter sunk and used screws rather than brads to back up the glue.
* and of course I would have stained and varnished the final product to insure a finished look and longevity. :)

But hey, it's a rough prototype... right? :?
Though I'll admit the squeeze out is already starting to annoy me. :roll:
You can tell a lot about the character of a man...
by the way he treats those who can do nothing for him.

I don't look back at the things I can no longer do, I just look forward to the things I still can.

User avatar
fortyshooter
Ranch Foreman
Posts: 7089
Joined: Sat Dec 09, 2017 10:37 am
Location: Va.
United States of America

Re: Teaser: Project for the shooting bench

Post by fortyshooter » Sun Oct 09, 2022 7:43 pm

That is a nice range project!

User avatar
BrokenolMarine
Ranch Foreman
Posts: 7473
Joined: Sat Nov 26, 2016 8:28 am
Location: South Central Oklahoma in the mountains
United States of America

Re: Teaser: Project for the shooting bench

Post by BrokenolMarine » Sun Oct 09, 2022 11:39 pm

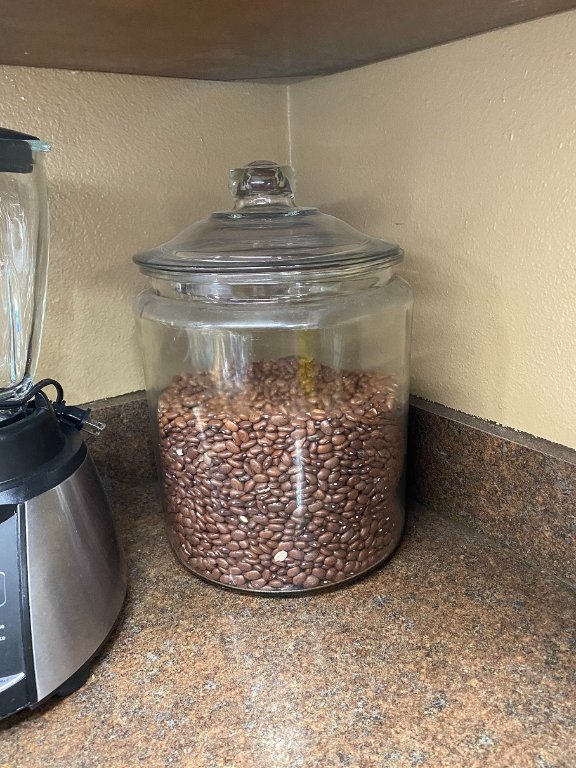
Ah, couldn't stand it. It was like it was hanging over my head. I remembered we had one of those big glass cookie jars that used to have butter cookies in them when we were kids... (They cost a nickel, shaped like a daisy and you'd wear it on your finger and slowly eat around the cookie. Anyone else remember them?) ... but this one is filled with beans, we have another filled with rice.
01 beans.jpg
01 beans.jpg (123.03 KiB) Viewed 942 times

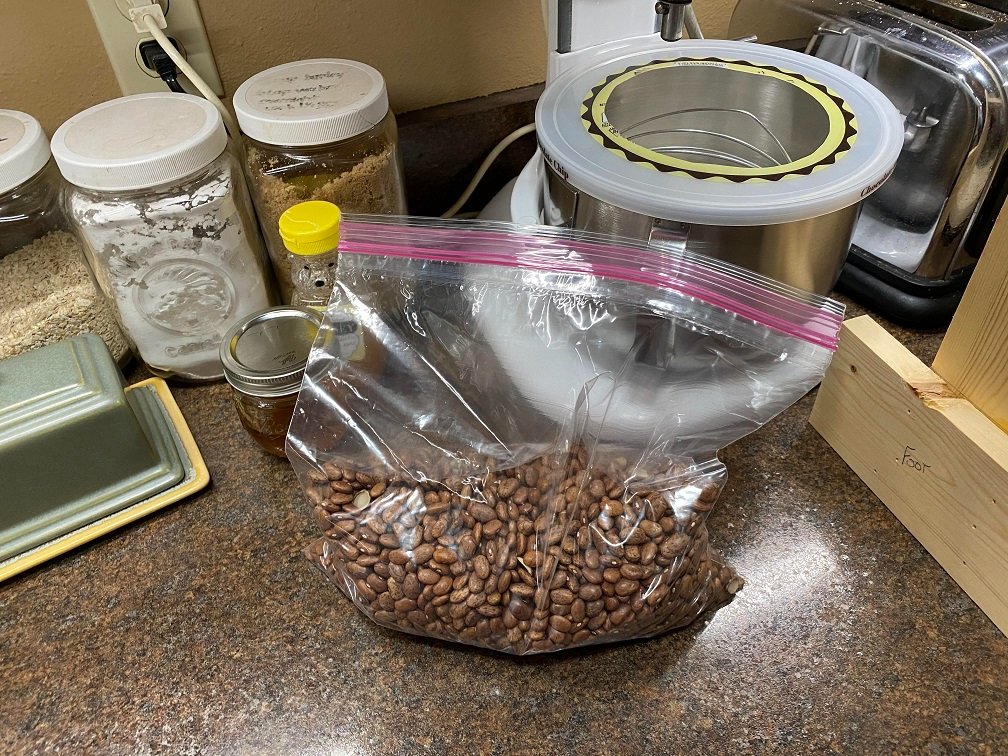
Yup, found it. Filled a gallon ziploc half full. Tested it on the stand. Just right
02 bagged.jpg
02 bagged.jpg (249.48 KiB) Viewed 942 times

I added a second bag for security purposes and taped the edge shut. Again, for security. I don't plan to beat it up, but it could fall, or get knocked off the table. You never know. :?

03 double bagged and taped.jpg
03 double bagged and taped.jpg (262.48 KiB) Viewed 942 times

Took it all out to the shop, and started looking for material for the cover. Hmmm, what would work well. Then I remembered a bag filled with, um... bags. You know, swag bags and the like. I found a waterproof bag we used kayaking to keep towels or valuables in when saltwater kayaking. We had three or four and this small one won't see a lot of action in Oklahoma.

04 the bag.jpg
04 the bag.jpg (142.61 KiB) Viewed 942 times

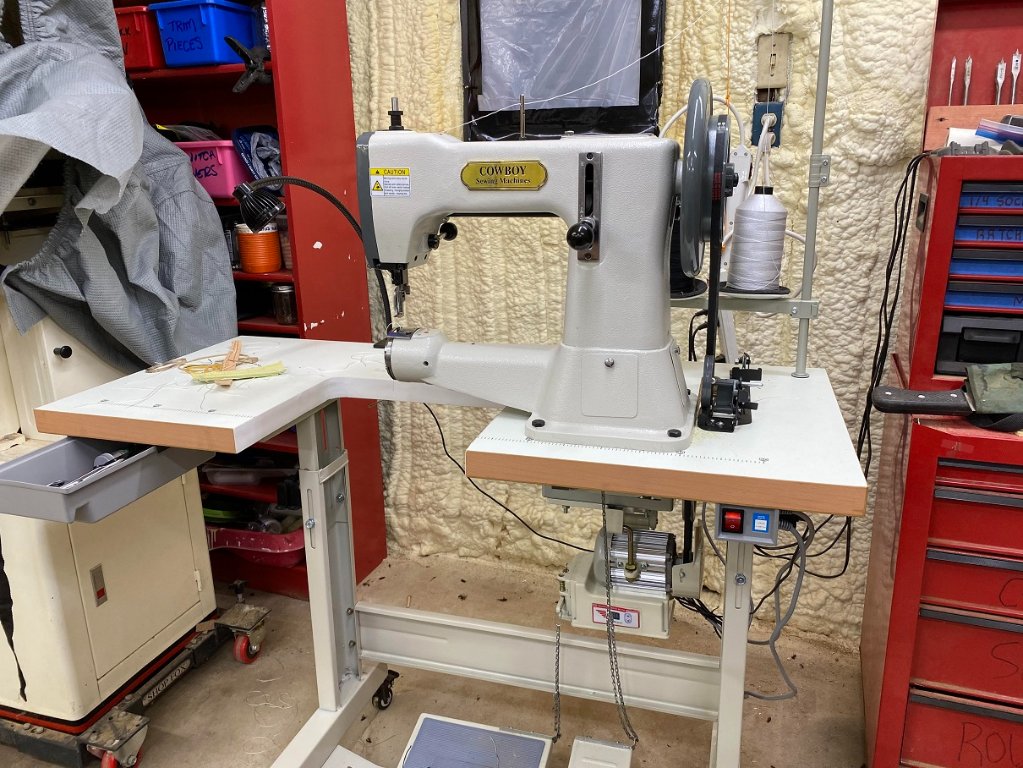
I'll be sewing it on the Cowboy 3200. I am still learning, so it won't be pretty, but it should work. First I dug thru the recycled buckles bin and pulled some used straps out as well. Gotta make sure it won't fall off every time I move the rifle around, right? Got everything together to get ready to give 'er a shot.
05 the machine.jpg
05 the machine.jpg (188.39 KiB) Viewed 942 times

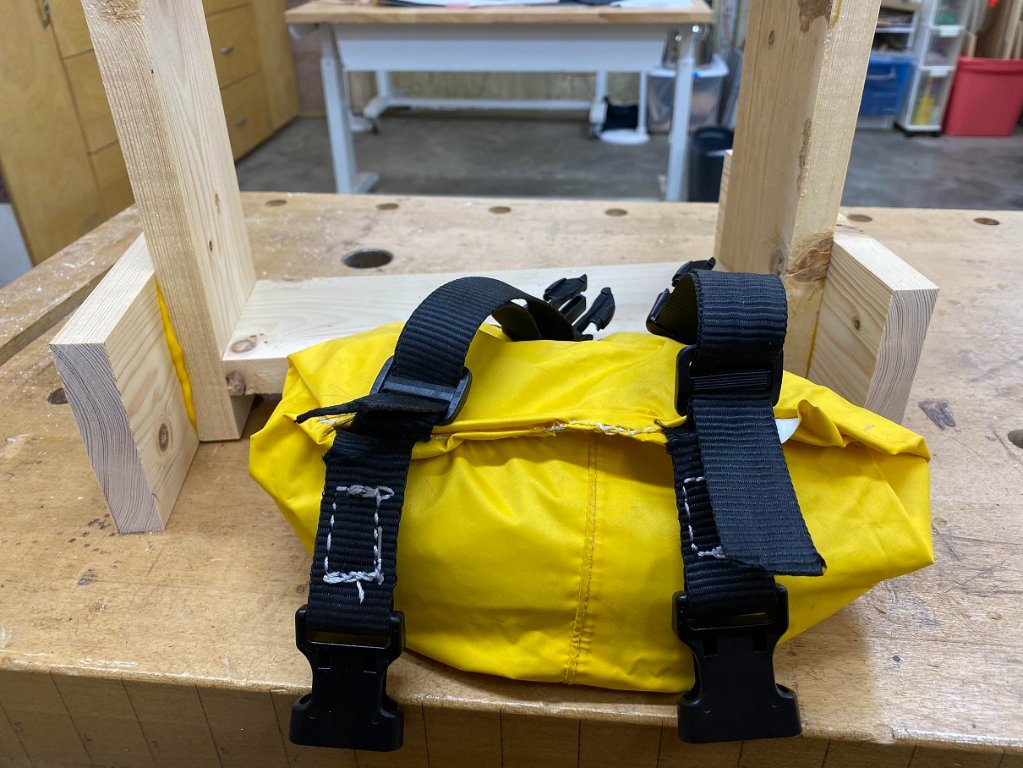
I took my time and sewed the straps first. One end of each strap had to have the buckles sewn on. The other end is adjustable so it gets threaded on. Done. Then the bag of beans went in, test folded and marked. The straps were folded and marked where they would be attached to lay right on the shelf. Then... pucker factor was high... I sewed it all.
06 sewn.jpg
06 sewn.jpg (148.36 KiB) Viewed 942 times

I was right, it wasn't pretty, but it WAS functional. That gap you see in the picture is of no consequence. I sewed four passes farther in, back and forth. Plus, the beans are double bagged and taped, and the closure is on the bottom. 8-) :twisted: I may be old, and slow, but I'm not dumb. I hid my sloppy stitches. :) Mounted it on the stand. Whadya know, it worked.

07mounted.jpg
07mounted.jpg (149.04 KiB) Viewed 942 times


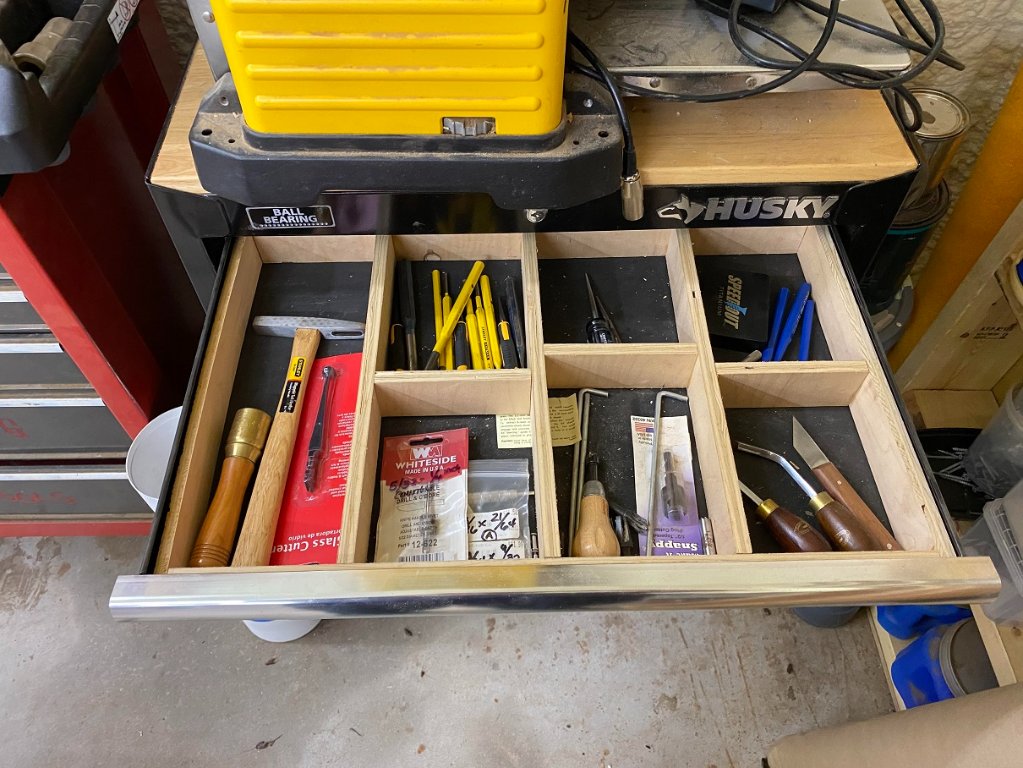
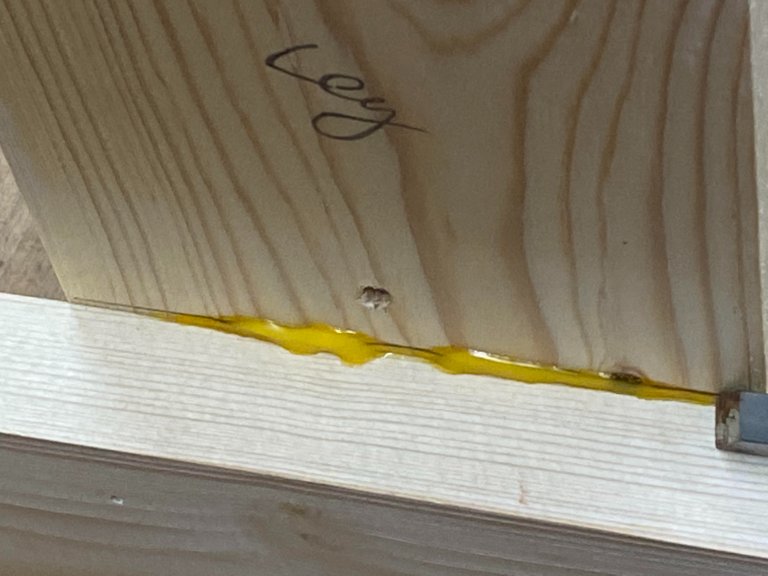
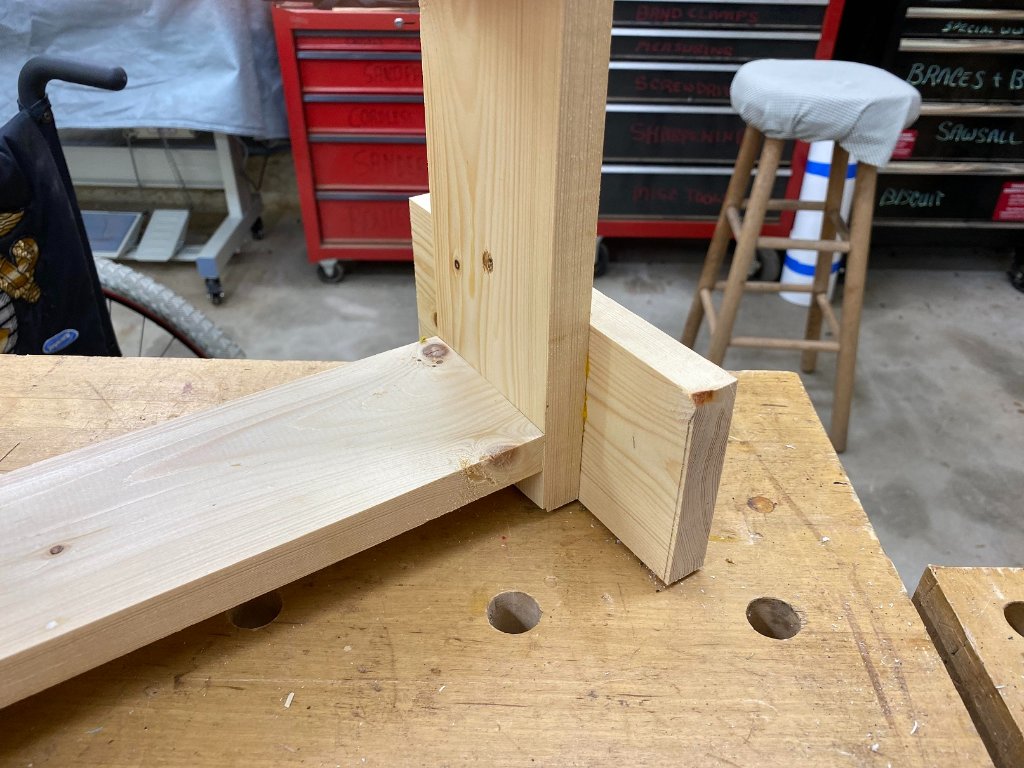
So... that glue squeezeout. Annoying. Let's peek in the special tools drawer.
08 Special Tools drawer.jpg
08 Special Tools drawer.jpg (166.03 KiB) Viewed 942 times

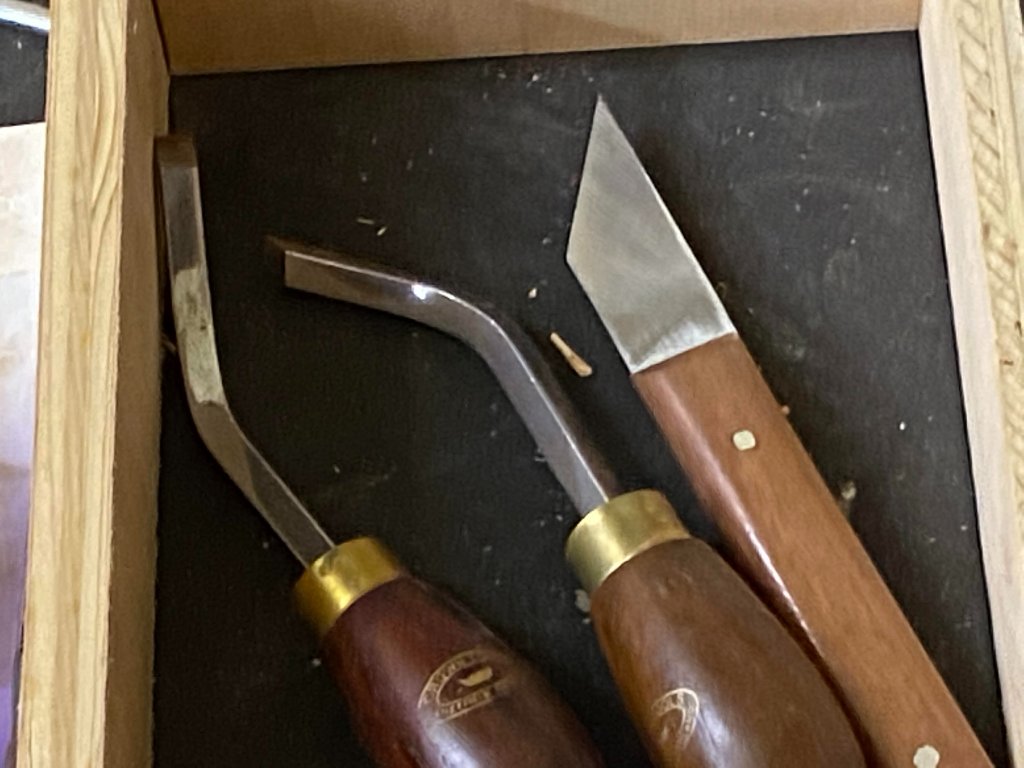
Right there to the far right side, the angled chisels are MADE for just that purpose. Cleaning out corners. There they are, see them?
09 angled chisels.jpg
09 angled chisels.jpg (103.35 KiB) Viewed 942 times

Look coming in at the top of the picture.... see the chisel tip? rides against the corner.
10 tip on the right.jpg
10 tip on the right.jpg (67.7 KiB) Viewed 942 times

Yup, all nice and clean now.
11 cleaned.jpg
11 cleaned.jpg (146.37 KiB) Viewed 942 times

I'll test it tomorrow or the next day. Worst case I break it down and reuse the beans and buckles, toss the rest and start over incorporating the improvements. Oh, wait. Worst case I pay $50 for the commercial rest. :cry: I don't bench enough rifles to do that. :lol:
You can tell a lot about the character of a man...
by the way he treats those who can do nothing for him.

I don't look back at the things I can no longer do, I just look forward to the things I still can.

User avatar
RetiredSeabee
Administrator
Posts: 2488
Joined: Mon Mar 21, 2016 5:04 pm
Location: Harrisburg, North Carolina
United States of America

Re: Teaser: Project for the shooting bench

Post by RetiredSeabee » Mon Oct 10, 2022 8:50 am

Thanks Marine, as soon as I saw the glue I knew you would have to clean that up.
Load on Sunday and Shoot all Week.......okay it's a Mare's Leg I will reload on Wednesday. ;)

User avatar
BrokenolMarine
Ranch Foreman
Posts: 7473
Joined: Sat Nov 26, 2016 8:28 am
Location: South Central Oklahoma in the mountains
United States of America

Re: Teaser: Project for the shooting bench

Post by BrokenolMarine » Mon Oct 10, 2022 8:57 am

We finally got rain this morning.... It's been months. The ground was so dry it was cracked, and the pond is down about twelve feet... Yeah! It can rain all day, but testing will have to wait just a bit. :D
You can tell a lot about the character of a man...
by the way he treats those who can do nothing for him.

I don't look back at the things I can no longer do, I just look forward to the things I still can.

User avatar
clovishound
Drover
Posts: 2522
Joined: Wed Apr 13, 2016 4:18 pm
Location: Summerville SC
United States of America

Re: Teaser: Project for the shooting bench

Post by clovishound » Mon Oct 10, 2022 11:53 am

I would at least run one of these over the edges. It should only take a couple minutes, and might save you some splinter pulling later.


IMG_0260.jpg
IMG_0260.jpg (133.92 KiB) Viewed 912 times
There is, I think, humor here which does not translate well from English to sanity. - Sanya

User avatar
BrokenolMarine
Ranch Foreman
Posts: 7473
Joined: Sat Nov 26, 2016 8:28 am
Location: South Central Oklahoma in the mountains
United States of America

Re: Teaser: Project for the shooting bench

Post by BrokenolMarine » Mon Oct 10, 2022 12:47 pm

I have a plane or two...
You can tell a lot about the character of a man...
by the way he treats those who can do nothing for him.

I don't look back at the things I can no longer do, I just look forward to the things I still can.

User avatar
BrokenolMarine
Ranch Foreman
Posts: 7473
Joined: Sat Nov 26, 2016 8:28 am
Location: South Central Oklahoma in the mountains
United States of America

Re: Teaser: Project for the shooting bench

Post by BrokenolMarine » Mon Oct 10, 2022 5:44 pm

clovishound wrote:
Mon Oct 10, 2022 11:53 am
I would at least run one of these over the edges. It should only take a couple minutes, and might save you some splinter pulling later.


IMG_0260.jpg
Yeah, yeah, you got me. I went out to drop something in the shop, and for some reason the Rifle Rest followed me out, so I opened the plane drawer, and pulled out a plane. (Under this sliding drawer tray, are the bigger planes... )

12 planes.jpg
12 planes.jpg (201.02 KiB) Viewed 728 times

About twenty minutes work with the plane, and a five minute touch up with the sander and she's all rounded off where I would want it rounded. The shelf edges I left sharp intentionally.

13 rounded.jpg
13 rounded.jpg (159.15 KiB) Viewed 728 times


NO, nope, I won't finish it. I'm not staining and varnishing. I'm not.


for now. :?
You can tell a lot about the character of a man...
by the way he treats those who can do nothing for him.

I don't look back at the things I can no longer do, I just look forward to the things I still can.

User avatar
RetiredSeabee
Administrator
Posts: 2488
Joined: Mon Mar 21, 2016 5:04 pm
Location: Harrisburg, North Carolina
United States of America

Re: Teaser: Project for the shooting bench

Post by RetiredSeabee » Mon Oct 10, 2022 6:33 pm

Yeah…… looking forward to the stain and finish that you’re not going to use.
Load on Sunday and Shoot all Week.......okay it's a Mare's Leg I will reload on Wednesday. ;)

User avatar
BrokenolMarine
Ranch Foreman
Posts: 7473
Joined: Sat Nov 26, 2016 8:28 am
Location: South Central Oklahoma in the mountains
United States of America

Re: Teaser: Project for the shooting bench

Post by BrokenolMarine » Mon Oct 10, 2022 6:47 pm

Nope, not.
You can tell a lot about the character of a man...
by the way he treats those who can do nothing for him.

I don't look back at the things I can no longer do, I just look forward to the things I still can.

User avatar
BrokenolMarine
Ranch Foreman
Posts: 7473
Joined: Sat Nov 26, 2016 8:28 am
Location: South Central Oklahoma in the mountains
United States of America

Re: Teaser: Project for the shooting bench

Post by BrokenolMarine » Mon Oct 10, 2022 6:47 pm

You can't make me. :D
You can tell a lot about the character of a man...
by the way he treats those who can do nothing for him.

I don't look back at the things I can no longer do, I just look forward to the things I still can.

User avatar
BrokenolMarine
Ranch Foreman
Posts: 7473
Joined: Sat Nov 26, 2016 8:28 am
Location: South Central Oklahoma in the mountains
United States of America

Re: Teaser: Project for the shooting bench

Post by BrokenolMarine » Tue Oct 11, 2022 12:11 am

RetiredSeabee wrote:
Mon Oct 10, 2022 6:33 pm
Yeah…… looking forward to the stain and finish that you’re not going to use.
:roll:

Maybe walnut...

Wait, what?
:?
You can tell a lot about the character of a man...
by the way he treats those who can do nothing for him.

I don't look back at the things I can no longer do, I just look forward to the things I still can.

User avatar
clovishound
Drover
Posts: 2522
Joined: Wed Apr 13, 2016 4:18 pm
Location: Summerville SC
United States of America

Re: Teaser: Project for the shooting bench

Post by clovishound » Tue Oct 11, 2022 9:06 am

How do you like the Lee Valley spokeshaves? I broke down and bought one last year. What a beautiful little tool. I found it more useful for other things than what I bought it for. In fact, I would like have used it to ease the edges on that bench.

I would probably have just gone with one of the vintage Stanleys vs the more expensive Lee Valley. That is, if I could have found one at a reasonable price without resorting to Flea Bay.
There is, I think, humor here which does not translate well from English to sanity. - Sanya

User avatar
markiver54
Deputy Marshal
Posts: 11127
Joined: Sun Nov 04, 2018 11:49 am
Location: Biue Ridge Mountains, NC
United States of America

Re: Teaser: Project for the shooting bench

Post by markiver54 » Tue Oct 11, 2022 9:14 am

Assuming you got rid of all the squeeze out, then I'm sure pics with stain will follow. 😁
I'm your Huckleberry

User avatar
BrokenolMarine
Ranch Foreman
Posts: 7473
Joined: Sat Nov 26, 2016 8:28 am
Location: South Central Oklahoma in the mountains
United States of America

Re: Teaser: Project for the shooting bench

Post by BrokenolMarine » Tue Oct 11, 2022 10:20 am

clovishound wrote:
Tue Oct 11, 2022 9:06 am
How do you like the Lee Valley spokeshaves? I broke down and bought one last year. What a beautiful little tool. I found it more useful for other things than what I bought it for. In fact, I would like have used it to ease the edges on that bench.

I would probably have just gone with one of the vintage Stanleys vs the more expensive Lee Valley. That is, if I could have found one at a reasonable price without resorting to Flea Bay.
I love them. Keep them sharp and they work beautifully. I bought them to make a custom cane, as I don't have a lathe. I ended up making two. :D
You can tell a lot about the character of a man...
by the way he treats those who can do nothing for him.

I don't look back at the things I can no longer do, I just look forward to the things I still can.

User avatar
Hatchdog
Ranch Foreman
Posts: 7982
Joined: Mon Jan 06, 2020 5:04 pm
Location: Deer Park, WA
United States of America

Re: Teaser: Project for the shooting bench

Post by Hatchdog » Tue Oct 11, 2022 10:39 am

Sigh, I sure wish you were my neighbor. :D

I worked at a Boeing fabrication plant and we used adhesive to bond parts together. We were required to have continuous squeeze out between the two pieces. We did use a tool called a faying tool to clean it up and make it not lumpy. Of course in “unseen” airplane parts fit, form and function were king, not appearance.

That rest is wonderful and another example of your skill. Thanks for sharing.

:D

User avatar
BrokenolMarine
Ranch Foreman
Posts: 7473
Joined: Sat Nov 26, 2016 8:28 am
Location: South Central Oklahoma in the mountains
United States of America

Re: Teaser: Project for the shooting bench

Post by BrokenolMarine » Tue Oct 11, 2022 11:25 am

Clovis, I used the Veritas Cornering Kit to round the edges. I bought them years ago, and they work rather well. AS long as you keep them sharp. The kit includes a sharpening block you wrap sandpaper around to sharpen them with.

14 cornering kit.jpg
14 cornering kit.jpg (98.28 KiB) Viewed 704 times

They don't work very well on end grain, so for that I used my favorite all around go to plane, a VERY old Craftsman Plane. Keep the iron sharp and it will trim a door, make a piece of molding fit perfectly, or in this case, roll the edge on a Rifle Rest. I have a lot of other planes in the drawer, but this one belonged to my stepfather, carried in his personal tool box, and we weren't allowed to touch it on the jobs. When he passed it was one of the few things I grabbed and made sure I kept, along with his hammer and square. He taught me the love of woodworking.

15 favorite plane.jpg
15 favorite plane.jpg (107.91 KiB) Viewed 704 times

Speaking of the planes, here is a peek in the lower drawer. Years ago, when I first joined my woodworking forum, I asked them how to make the most of my "small shop." I was working in a small 12x20 Amish wooden building, and rolling the tool I wanted to use to the center of the floor, then back against the wall. They said, get rid of the shelves lining the walls, and toss all the tool containers that tools always come in. Build a dedicated cabinet at one end that has a place for everything. I did, it really opened up the shop. The plane drawer was one of those "Places for everything."

16 lower drawer.jpg
16 lower drawer.jpg (176.41 KiB) Viewed 704 times

I put the shelf out in the sun first thing this morning. It got a tan. How bout that?

17 sun tan.jpg
17 sun tan.jpg (183.5 KiB) Viewed 704 times
You can tell a lot about the character of a man...
by the way he treats those who can do nothing for him.

I don't look back at the things I can no longer do, I just look forward to the things I still can.

Post Reply