Page 1 of 1
A left hand holster
Posted: Wed Jan 15, 2025 12:50 pm
by BrokenolMarine
for my daughter.
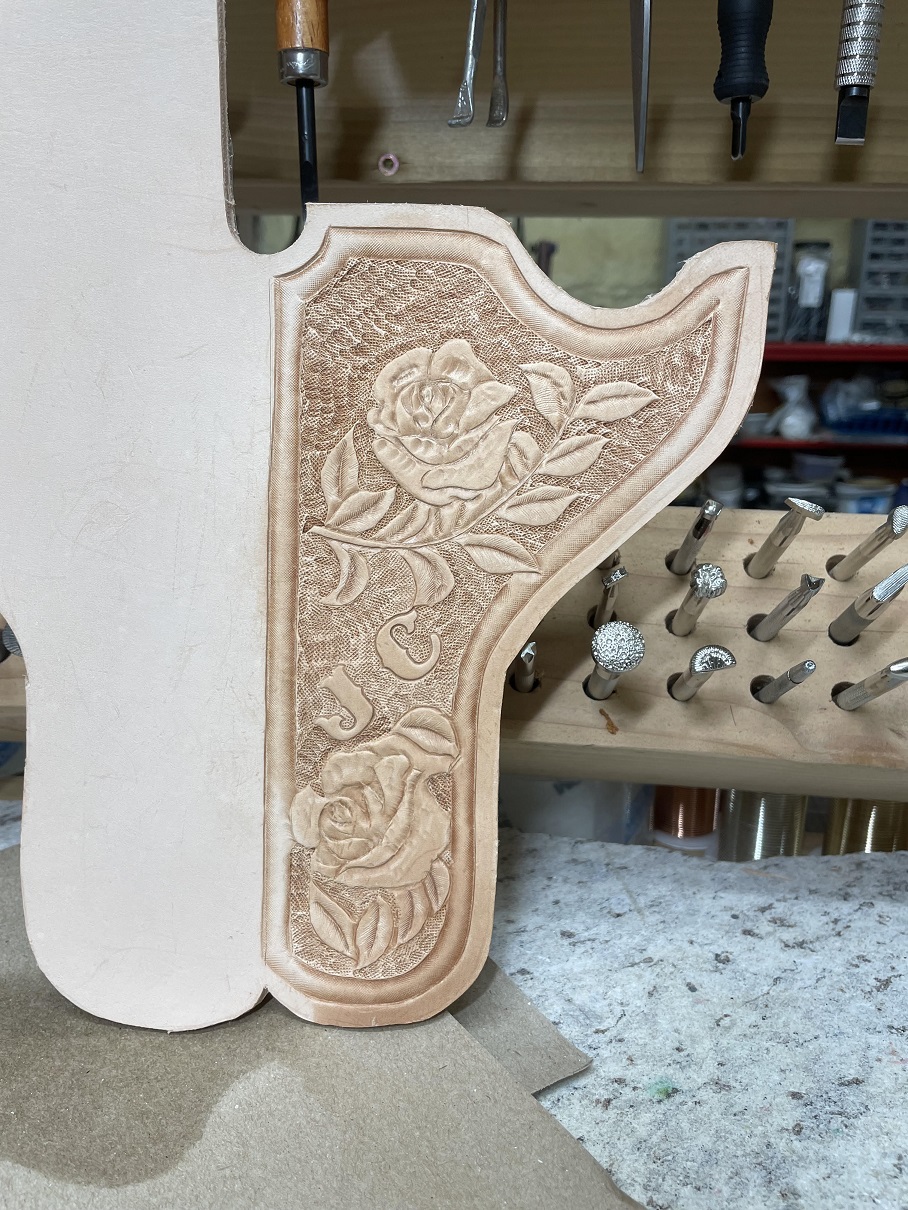
When I first cut out the holster for my December Gunbelt... I cut the dang thing out on the wrong side of the leather and I would have ended up with a rough side out holster... or a left handed holster, so I set aside that piece and recut the darn thing. I came back to the piece earlier this week and started on a left hand holster for my daughter's Frontier Single Action .22. Meh, practice makes perfect. I haven't mentioned it to her, and if it doesn't turn out, I'll toss it and just make her the pants belt I promised... without an accompanying holster. So far I have tooled the border and some roses...
- 03 leaves and background.jpg (456.58 KiB) Viewed 10929 times
I stamped her initials into the space between the roses, but don't like the balance. I'll probably background over them. Haven't decided for sure yet. I can always stamp them on a disc and add it... or put a concho there. I have some bejeweled ones.

Re: A left hand holster
Posted: Wed Jan 15, 2025 1:44 pm
by daytime dave
I think it flows, but that's just me.
Re: A left hand holster
Posted: Wed Jan 15, 2025 2:09 pm
by Mags
BrokenolMarine wrote: ↑Wed Jan 15, 2025 12:50 pm
for my daughter.
When I first cut out the holster for my December Gunbelt... I cut the dang thing out on the wrong side of the leather and I would have ended up with a rough side out holster... or a left handed holster, so I set aside that piece and recut the darn thing. I came back to the piece earlier this week and started on a left hand holster for my daughter's Frontier Single Action .22. Meh, practice makes perfect. I haven't mentioned it to her, and if it doesn't turn out, I'll toss it and just make her the pants belt I promised... without an accompanying holster. So far I have tooled the border and some roses...
03 leaves and background.jpg
I stamped her initials into the space between the roses, but don't like the balance. I'll probably background over them. Haven't decided for sure yet. I can always stamp them on a disc and add it... or put a concho there. I have some bejeweled ones.
That's going to be a beauty.
Re: A left hand holster
Posted: Wed Jan 15, 2025 6:25 pm
by BrokenolMarine
Miss Tina agrees, so I'll leave it as is. I will be back out in the shop as soon as the replacement space heater comes in. I heat the main shop space with the mini split, set at 68 degrees, but in Winter, I use a space heater to heat the bench areas to a bit warmer dut to the arthritis in my hands, shoulders, knees.. um... joints. That died a couple days ago...

Ordered a replacement and it's due in over the next couple days.
Can't wait, anxious to get back to work.

Re: A left hand holster
Posted: Sun Jan 19, 2025 10:42 am
by fortyshooter
BM you cut that holster out just the way I would have done it....me being a Lefty too! When finished it will look great I'm sure!
Re: A left hand holster
Posted: Sun Jan 19, 2025 5:30 pm
by BrokenolMarine
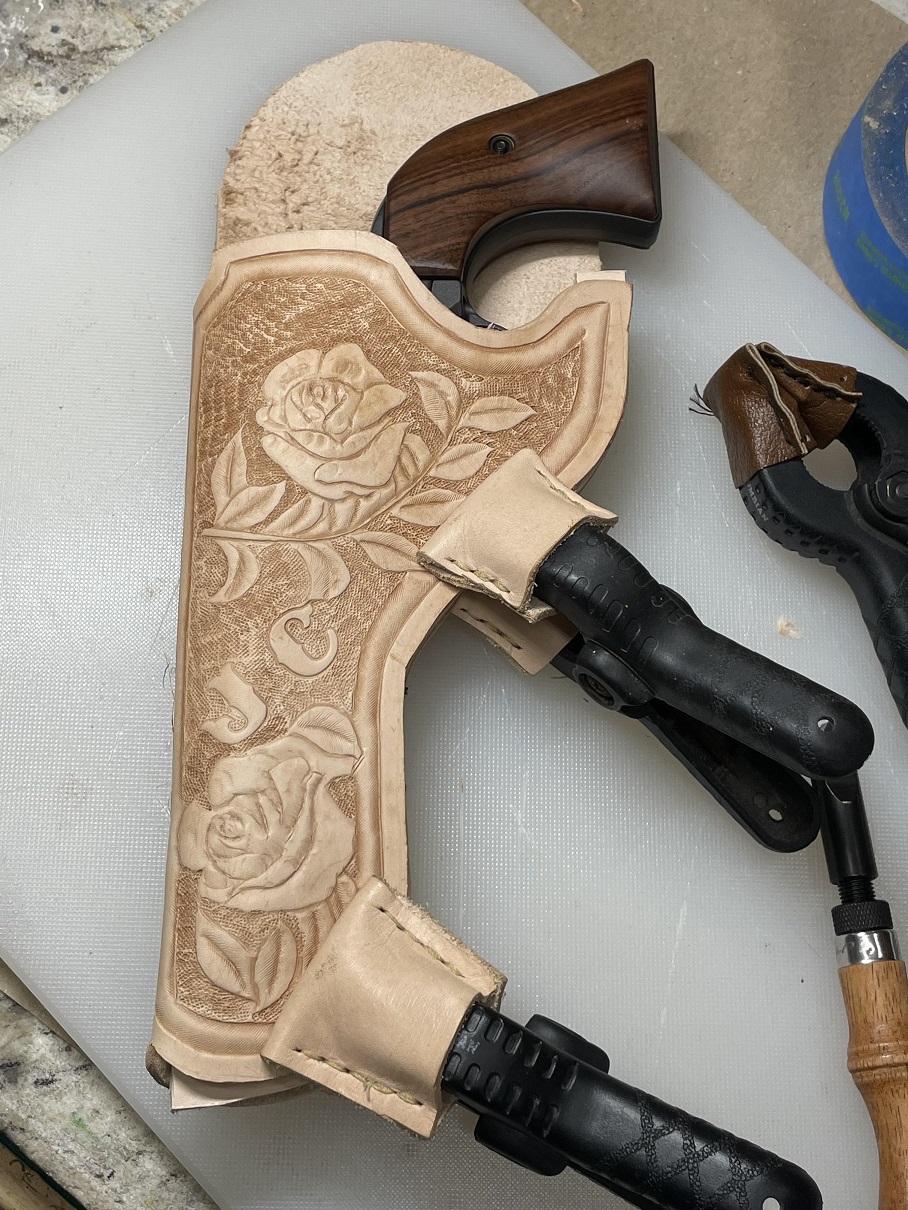
Over the last few days, or ... week... I have put some time in the holster. Weather has kept me from working EVERY day. After the initial work seen above, I stepped up and did a test fit with my Ruger Wrangler, it's about the same size as the daughter's Single Action .22.
- 05 test fit.jpg (458.56 KiB) Viewed 10809 times
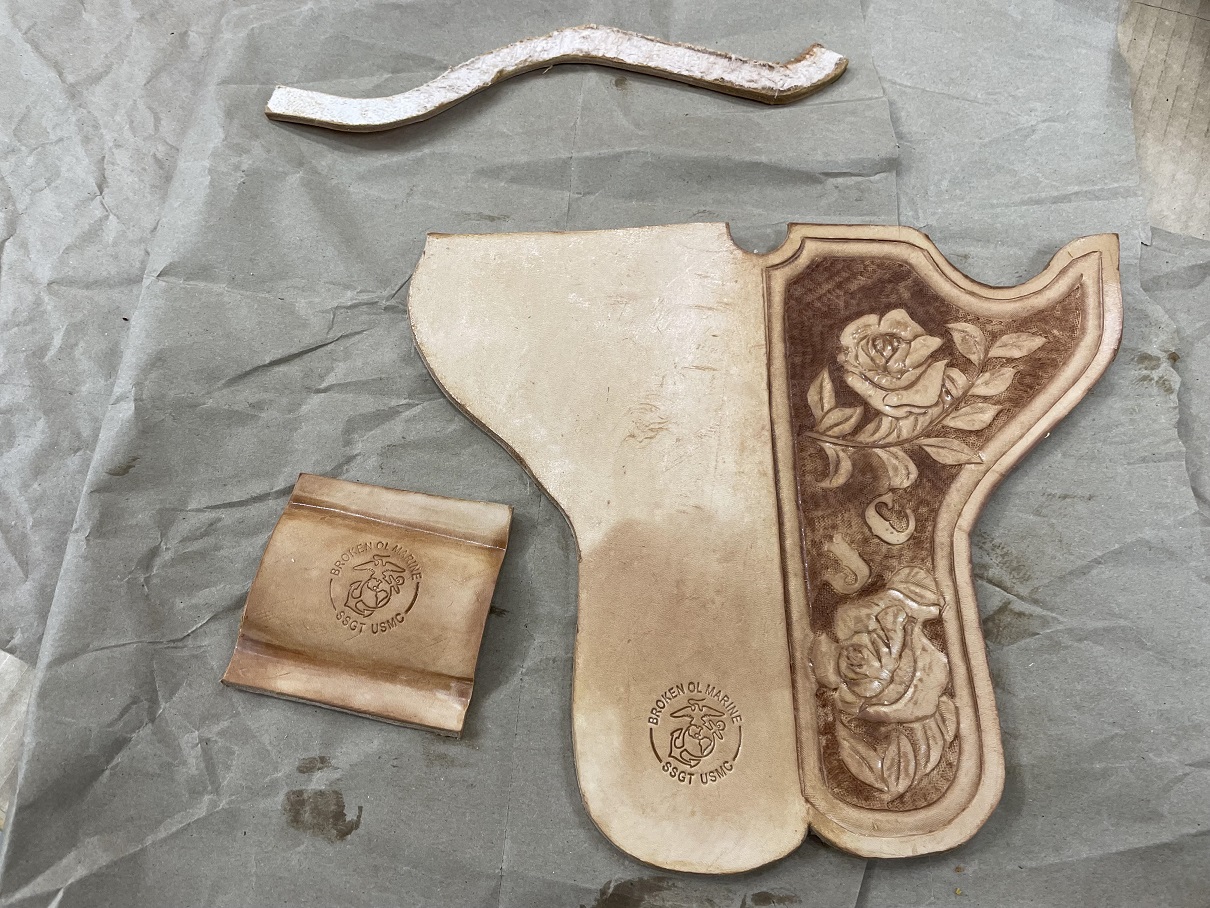
I oiled the leather to give it some color, with Golden Oak Watco, but didn't get the color I was looking for. Left it to dry overnight...
- 06 oiled.jpg (479.24 KiB) Viewed 10809 times
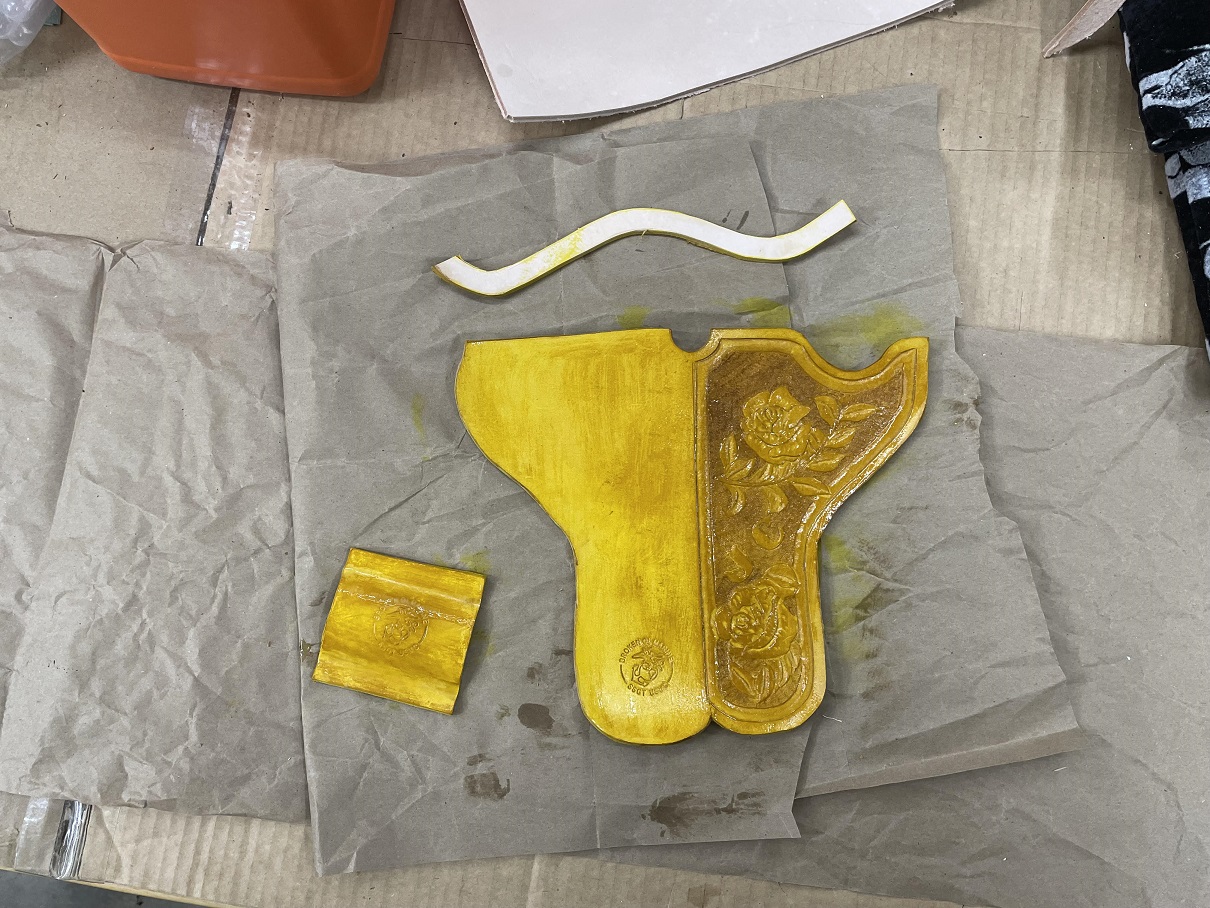
So I dyed the holster with a yellow dye looking for a golden color. It was golden when I dyed it, but dried BRIGHT yellow. Miss T nearly barfed.
- 07 yellow dye.jpg (448.45 KiB) Viewed 10809 times
To be honest, I wasn't thrilled, but "Ruined it" wasn't my opinion, I was FAR from done. I went over the holster with LT Brown Dye, two coats, then let it dry. Then antiqued it.
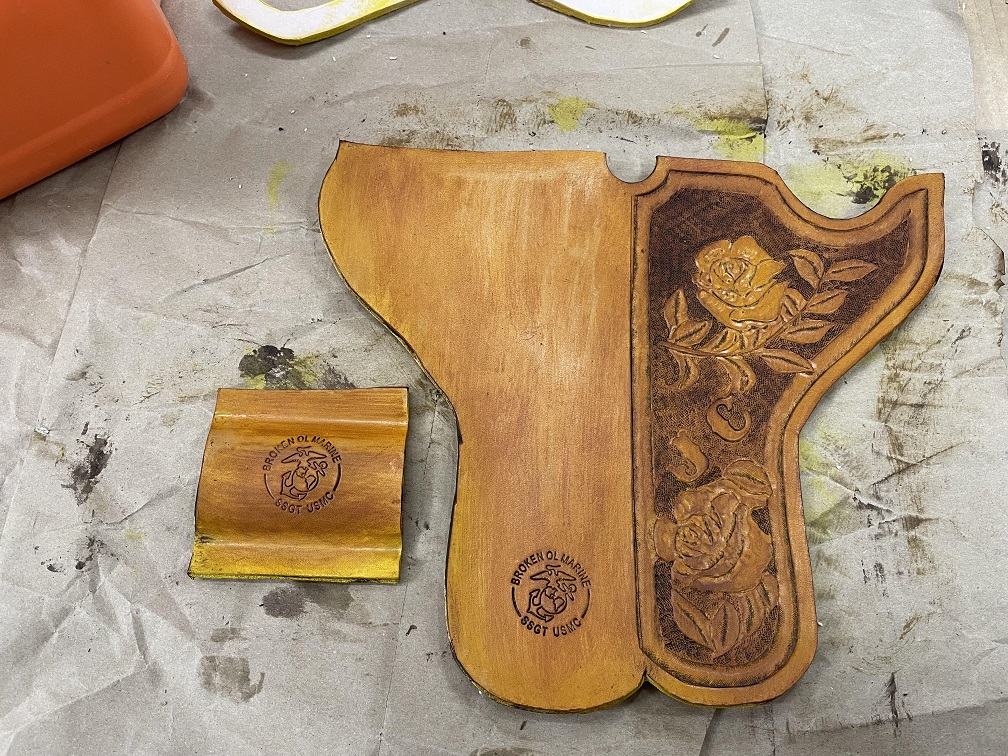
- 08 antiqued and brown dye.jpg (417.5 KiB) Viewed 10809 times
I was still not thrilled, but it was looking better. Yesterday and today I worked a bit more. I re-antiqued with a dark brown antique rather than the light brown, and worked the back panel with the antique to give it some texture. Then edge coated the holster and belt loop and burnished the edges. About ready to start the assembly.
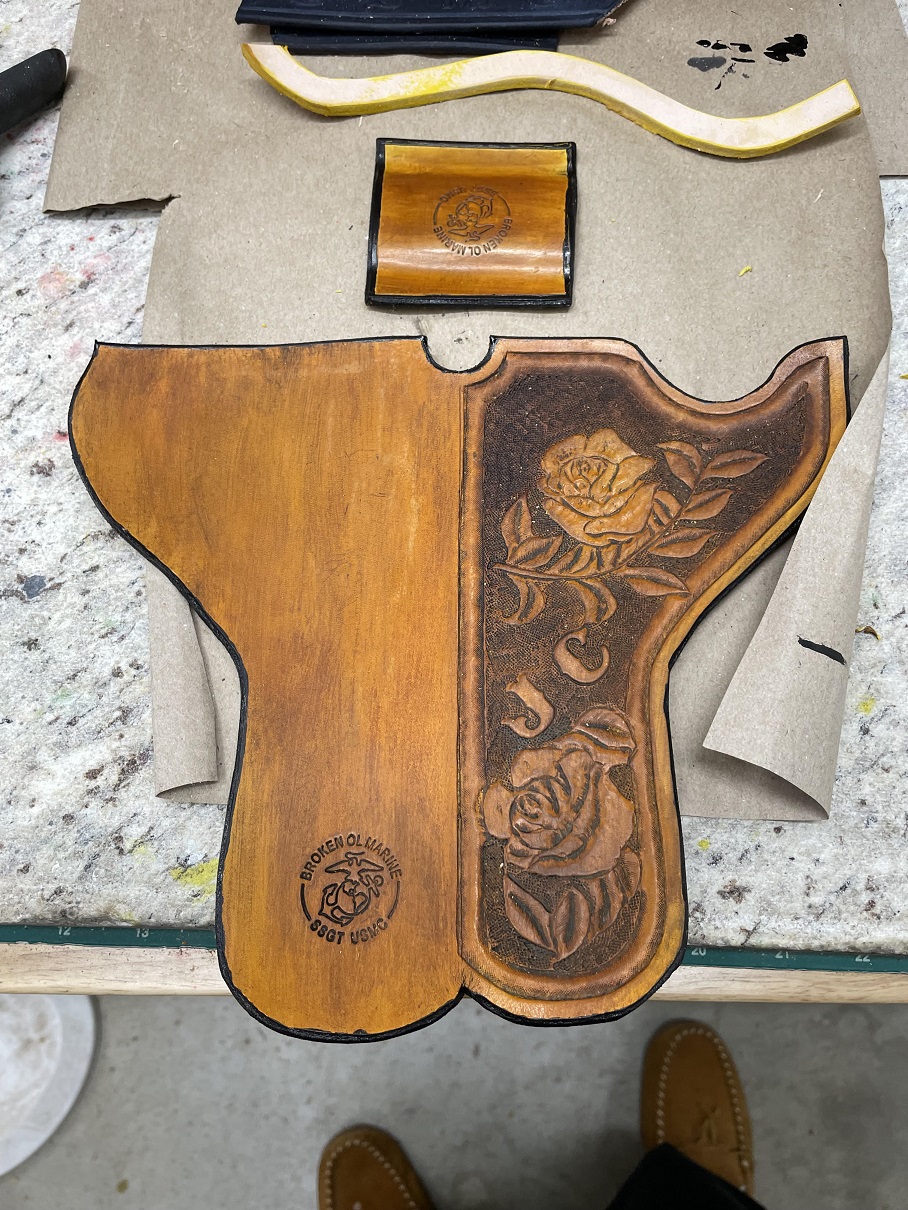
- 09 edge coat and burnished.jpg (501.61 KiB) Viewed 10809 times
The next time I try this rose pattern, I will REDO the transparency and do a better job on the transfer. I am NOT happy with the tooling, but Tina likes it. I'll try and do better in the future on the roses carvings ...

But, it's looking a lot better. Still a ways to go before it's ready to accept the gun. Then I'll start on the belt.

Re: A left hand holster
Posted: Sun Jan 19, 2025 5:31 pm
by BrokenolMarine
I watched several videos on shading and tooling floral patterns, I'll practice on scrap leather and SEE if there will be a next time.
Re: A left hand holster
Posted: Sun Jan 19, 2025 6:26 pm
by Mags
The dark brown is much better. I also think the tooling has great character.
Re: A left hand holster
Posted: Sun Jan 19, 2025 7:36 pm
by BrokenolMarine
Thanks. The transfer is done by placing the transparency over the dampened (cased) leather and following the lines with a stylus. This leaves the grooves l cut in with my swivel knife. It's a challenge for me. My hands have had a hard life.

I guess more practice would help as well.

Re: A left hand holster
Posted: Sun Jan 19, 2025 10:17 pm
by Mags
BrokenolMarine wrote: ↑Sun Jan 19, 2025 7:36 pm
... It's a challenge for me. My hands have had a hard life. ...
That is what gives it that special personal endearing character.
Re: A left hand holster
Posted: Sun Jan 19, 2025 10:31 pm
by BrokenolMarine
Mags wrote: ↑Sun Jan 19, 2025 10:17 pm
BrokenolMarine wrote: ↑Sun Jan 19, 2025 7:36 pm
... It's a challenge for me. My hands have had a hard life. ...
That is what gives it that special personal endearing character.
Yeah, yeah, that's the ticket. That's the line I use... Character.

Thanks.
Re: A left hand holster
Posted: Mon Jan 20, 2025 10:18 am
by Hatchdog
Like Miss Tina when I see the yellow dye you use I too am ready to barf. But we all have seen how you do your magic and in the end the color is perfect.
Re: A left hand holster
Posted: Tue Jan 21, 2025 6:24 pm
by BrokenolMarine
I put a coat of finish on the holster and let it dry, then slightly reshaped the belt loop to fit the contour of the back panel. I poked the holes in the belt loop, made some reference marks and punched the holes in the back panel, and aligned the loop and held it in position with alignment pins.
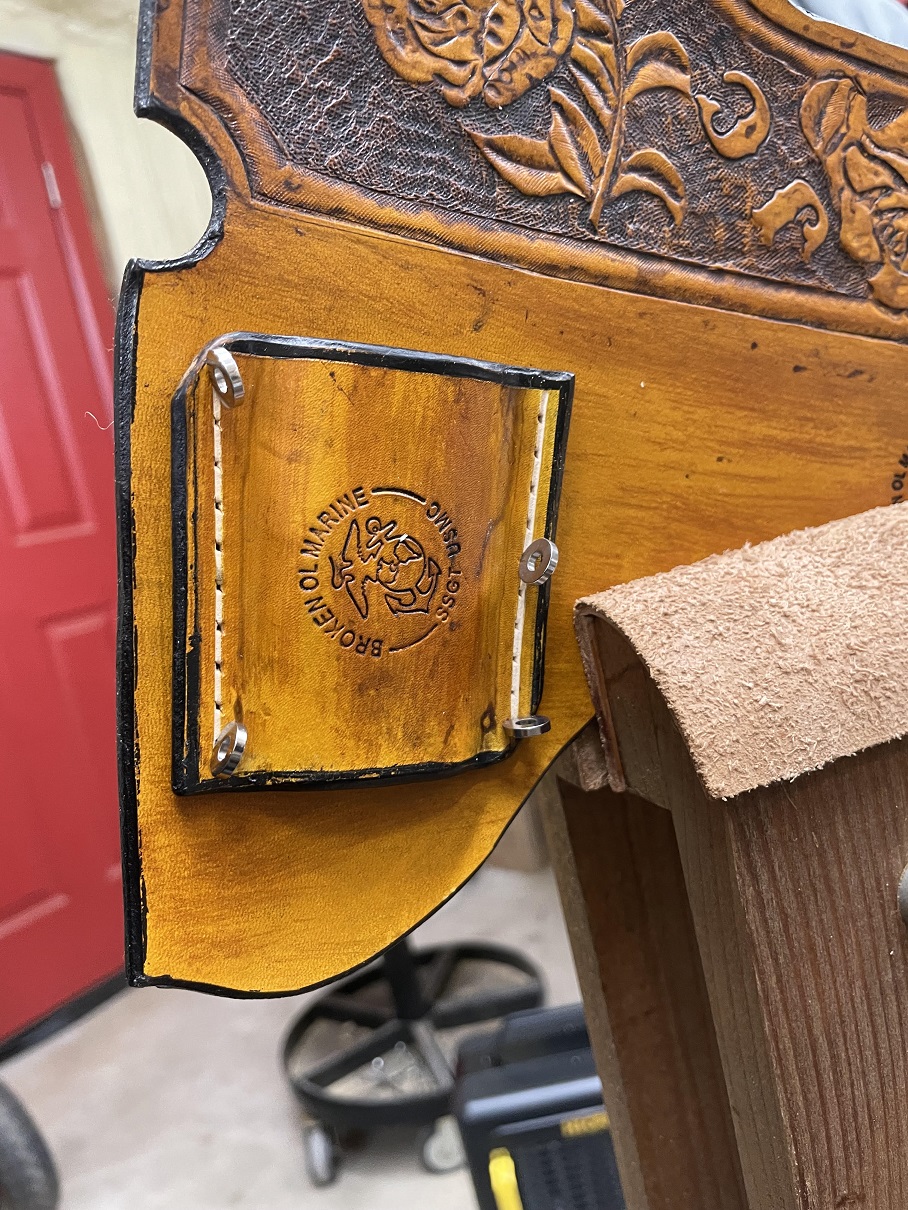
- 10 belt loop prepped.jpg (528.98 KiB) Viewed 11945 times
A view of the back side, showing the pins holding the belt loop a bit better. They are easily removed by pulling on the collar at the end of the brass sleeve.
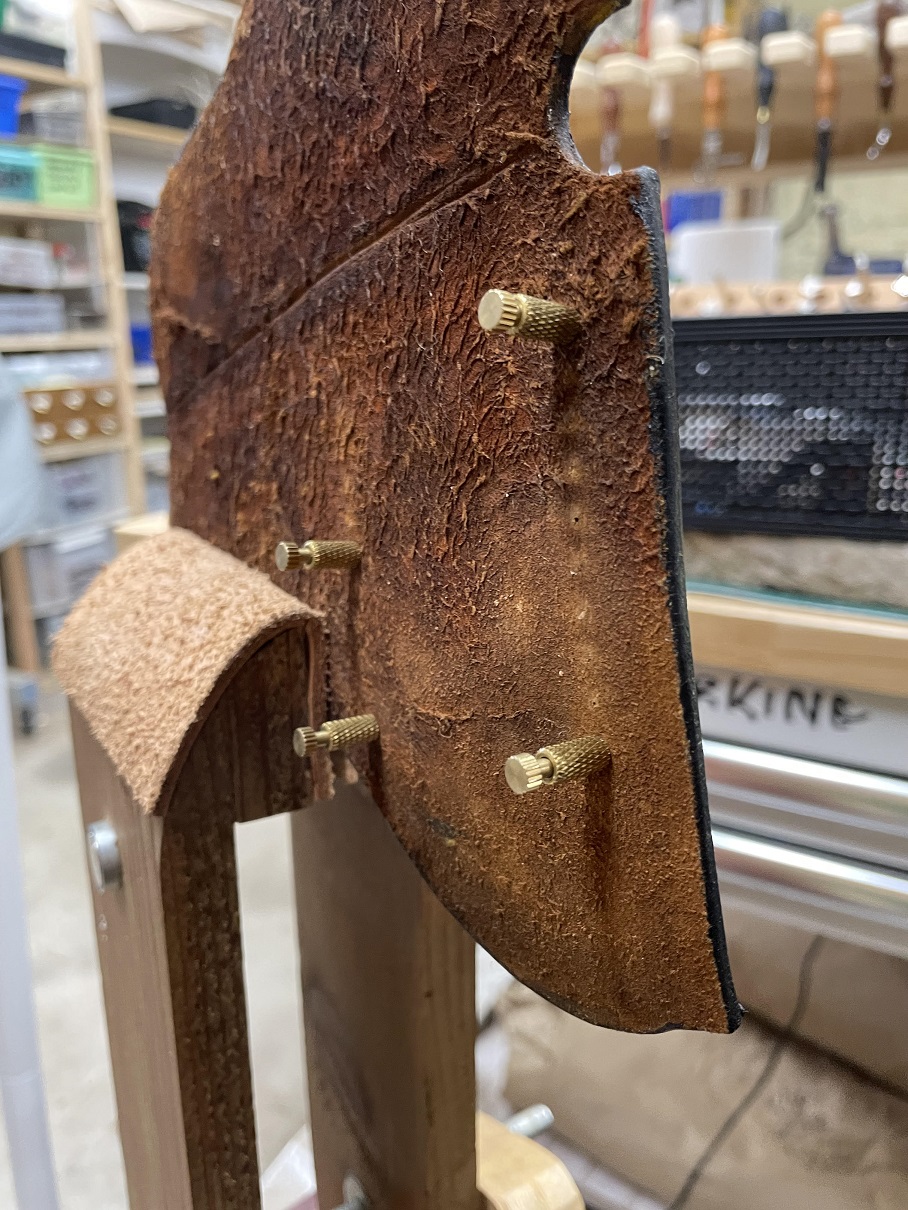
- 11 Back side.jpg (421.19 KiB) Viewed 11945 times
Once I started to sew, I removed the pins as I got to them. I sewed across, and then back to the beginning to insure good retention.
I was pretty happy with the outcome. I touched up the edge dressing and it looks pretty good for now. I may antique one last time to solidify the look once everything is done then apply a last coat of finish and wax.
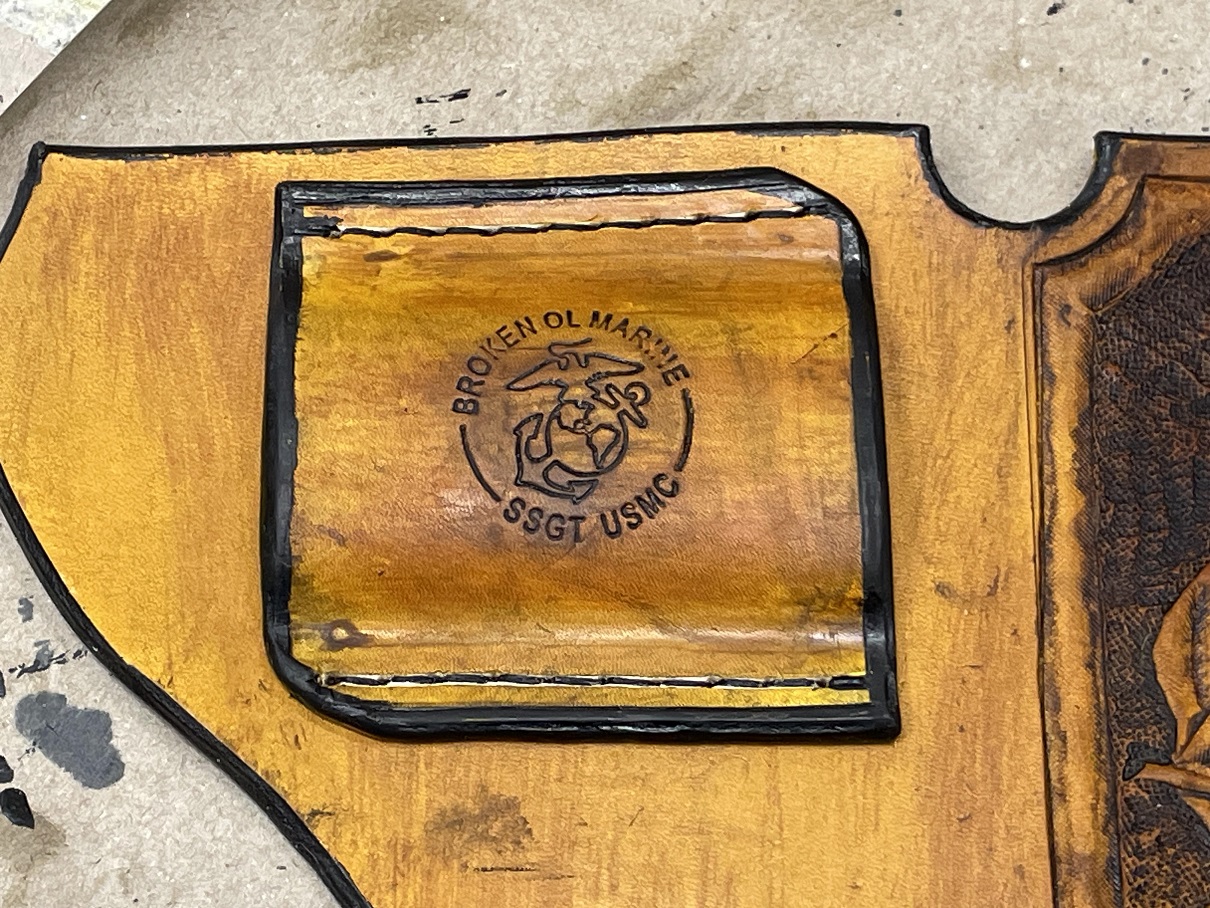
- 12 sewn into place.jpg (515.04 KiB) Viewed 11945 times
Before going inside for lunch, I glued the welt into place on the one side and left it to cure. I'll glue the two sides together then see about sewing them into place after they have a chance to cure. Boom, getting close.
Re: A left hand holster
Posted: Wed Jan 22, 2025 9:51 am
by Hatchdog
Looking good BOM. Seeing how you use those pins to index and hold the pieces together reminded me of a tool we used when I worked for Boeing. You’re probably familiar with them but they are called clecos. We would apply adhesive to two parts and use the clecos exactly as you did with the pins but of course would not sew the parts. Instead the holes where the clecos were located were then riveted. Your pins brought back memories.
Re: A left hand holster
Posted: Wed Jan 22, 2025 12:33 pm
by BrokenolMarine
In the Corps, the metal smiths used those in the hundreds to replace damaged panels on the helos. The ones they used were spring loaded and came in various sizes to match the increasing sizes of rivets.
Re: A left hand holster
Posted: Wed Jan 22, 2025 9:09 pm
by BrokenolMarine
Got out first thing this morning and folded over and glued the holster, after putting a thick dowel in the upper half of the holster to insure the proper fold. Left it for three or four hours, So that the contact cement could fully set.
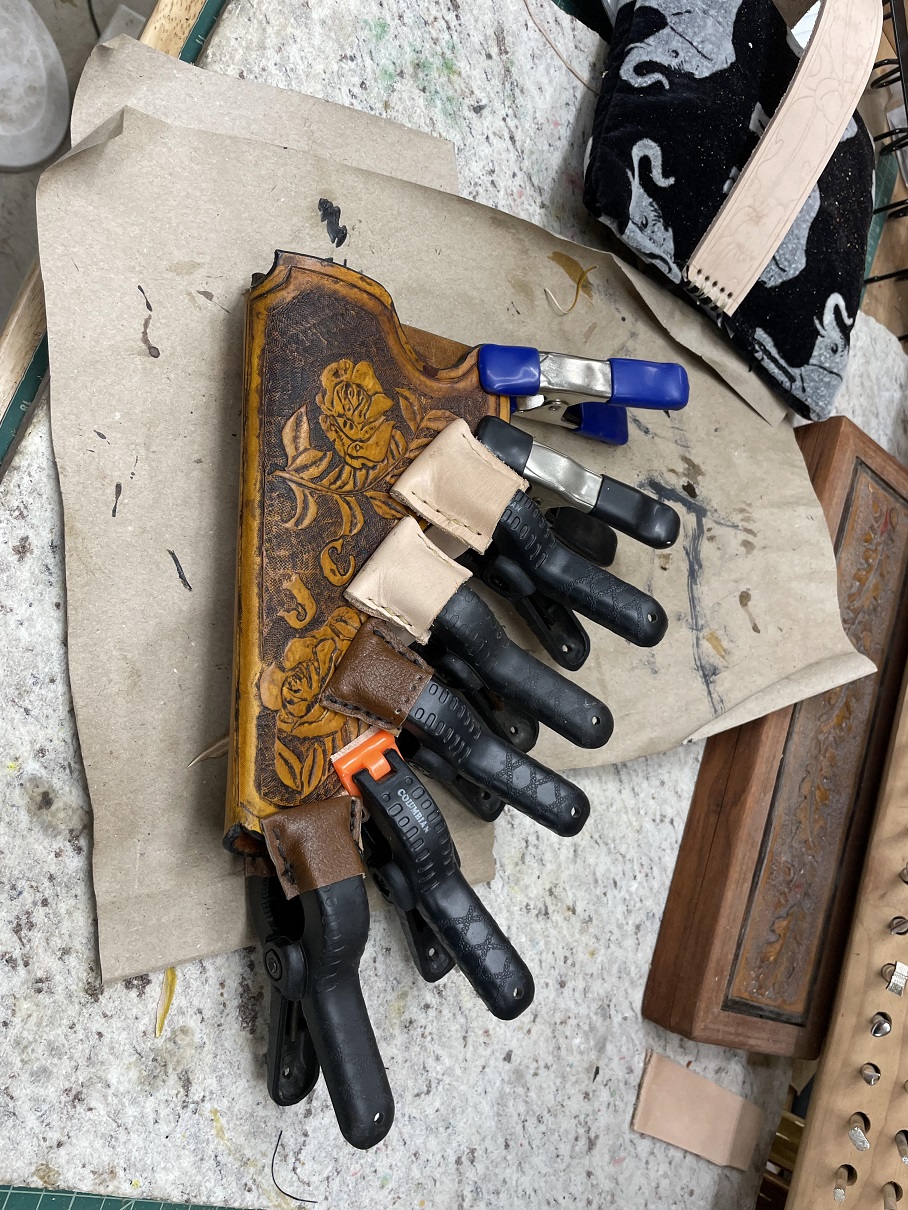
- 13 glued welt into place.jpg (515.25 KiB) Viewed 11926 times
I went back out after lunch and brought the holster in and sewed it up sitting inside keeping an eye out for UPS, a large group of packages due. Plus, it was a lot warmer in the house.
Took it out to the shop and did the final trimming, and still not satisfied with the appearance, dyed the holster with dark brown. A coating of linseed oil and burnished the edges, then two coats of wax. It's looking good.
Back side:
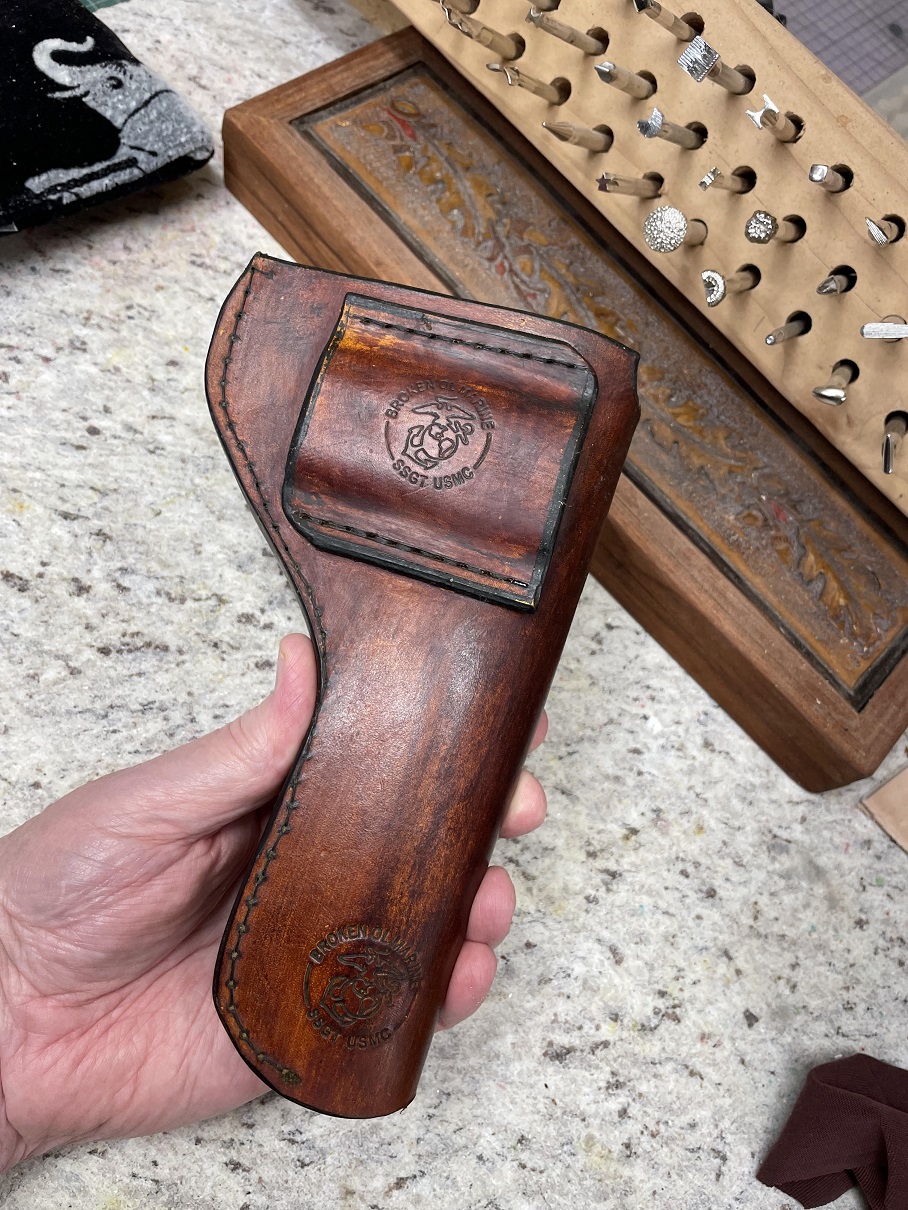
- 14 back view.jpg (476.64 KiB) Viewed 11926 times
The front view:
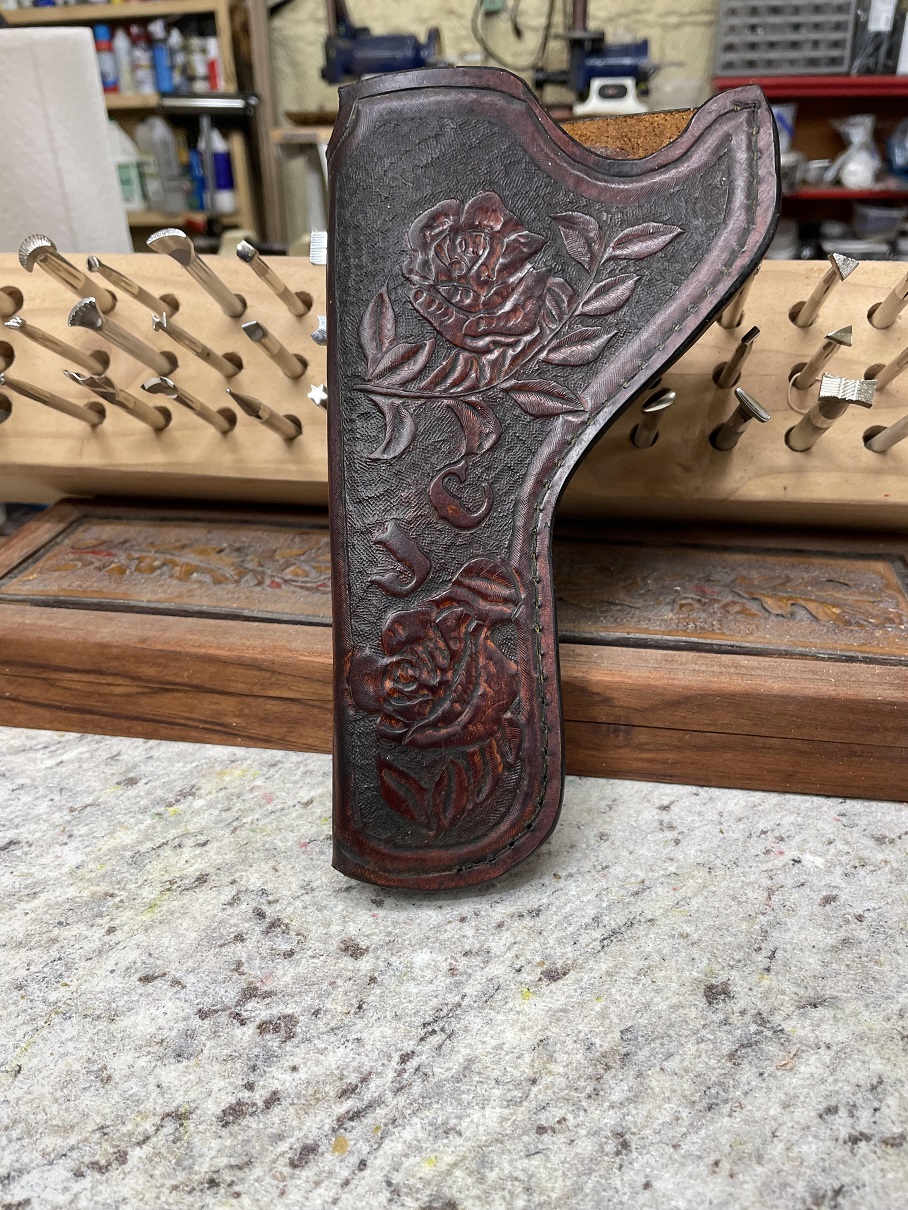
- 15 sewn and dyed.jpg (539.49 KiB) Viewed 11926 times
Basically all that is left is to put the hammer loop in place, check for any minor touch ups, then take the final pics.
Re: A left hand holster
Posted: Thu Jan 23, 2025 8:03 am
by CT_Shooter
Beautiful!
Re: A left hand holster
Posted: Thu Jan 23, 2025 9:40 am
by Hatchdog
Yes, beautiful indeed. Your daughter is going to love it.